Preparing to Scan Code for a .NET Web Application
In this section, you will learn how to configure the
Globalyzer scanner by inspecting your source code files and then
setting up project and scan information.
Note: For this section, you need to download the
sample .NET code that will be used for the remainder of the
tutorial.
Please open a browser and navigate to a download link.
There are two download links available:
-
Project for Visual Studio 2008: https://www.globalyzer.com/gzserver/help/tutorials/tutorialNET/simplefor2008.zip
-
Project for Visual Studio 2010: https://www.globalyzer.com/gzserver/help/tutorials/tutorialNET/simplefor2010.zip
Save the zip file to a convenient location on your local system. If
you wish to build and execute the sample application, you will need to
have Visual Studio .NET installed. This is optional for the tutorial,
but will show you the results of your internationalization work firsthand.
-
To set up to build and run the sample application, unzip the
source into your IIS root directory, such as C:\Inetpub\wwwroot,
so that the simple directory is located directly below wwwroot.
Note: Unzipping to your IIS root directory is only necessary
if you plan on running the application. If you prefer,
you may unzip the source anywhere and skip to step 3.
The Visual Studio project expects the URL to be http://127.0.0.1 or http://localhost.
If this is the correct url, you can simply use Open Project/Solution within
visual studio and choose simple.sln from your unzip directory.
If you have deployed the application to a different server, you have
two options. First, you can edit this project accordingly. Alternatively, you
can create a new project, importing the following files from the .zip archive into
the new project via Project=>Add Existing Item
- AControl.cs
- Resourcer.cs
- simple.aspx
- simple.aspx.cs
- simpleSuccess.aspx
- simpleSuccess.aspx.cs
- User.cs
-
Once you are able to build the project, browse to simple.aspx
in your browser or right-click on simple.aspx in the
Solution Explorer and select View in Browser. If you have
the project set up correctly, you will see the following page:
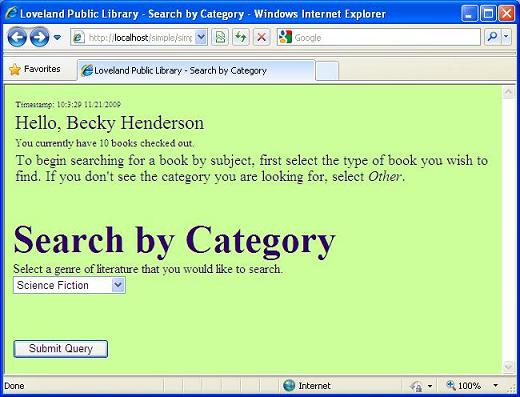
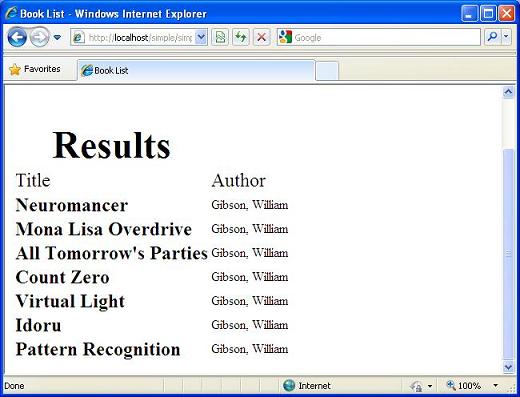
Clicking on the Submit Query button will trigger a
JavaScript alert. When you click the OK button in the
alert, you should see a static list of books displayed
in simpleSuccess.aspx page.
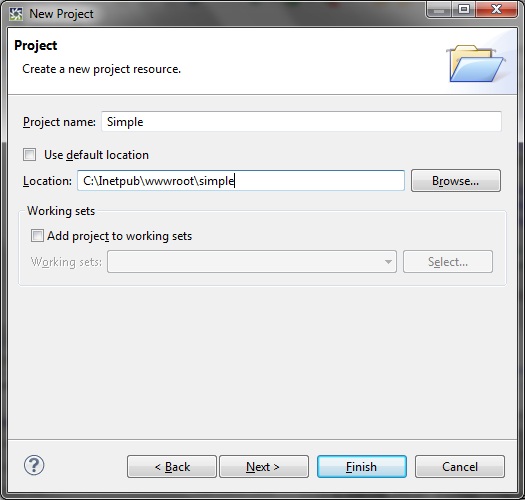
- Now that you have the tutorial source code ready, you create a Globalyzer
Workbench Project by selecting File=>New=>Project... and then General=>Project. In
the next page of the dialog give the project the name Simple,
uncheck Use default location and enter
"
C:\Inetpub\wwwroot\simple" (or where ever you have unzipped the source
code) as shown here:
- Click Finish. You
have now created an Eclipse project for your source.
You should see the following, where you can either associate the Eclipse project with
an existing Globalyzer project, or create a new Globalyzer project.

Click Close for the purpose of this tutorial.
-
The Globalyzer Workbench requires a one-to-one association between an Eclipse
project (what you just created) and a Globalyzer project. You can create the Globalyzer project either by clicking New after creating the Eclipse project, or by giving the
Eclipse project a Globalyzer Nature.
To add a Globalyzer Nature for our tutorial, right-click on
Simple in the Project Explorer view and select
Globalyzer=>Add/Remove Globalyzer Nature menu item:

The Select Globalyzer Project dialog should
appear again. This time, select New.
-
Globalyzer will automatically create an associated Globalyzer Project and will then display
the Manage Scans Wizard so that you can create your first Scan for the project.
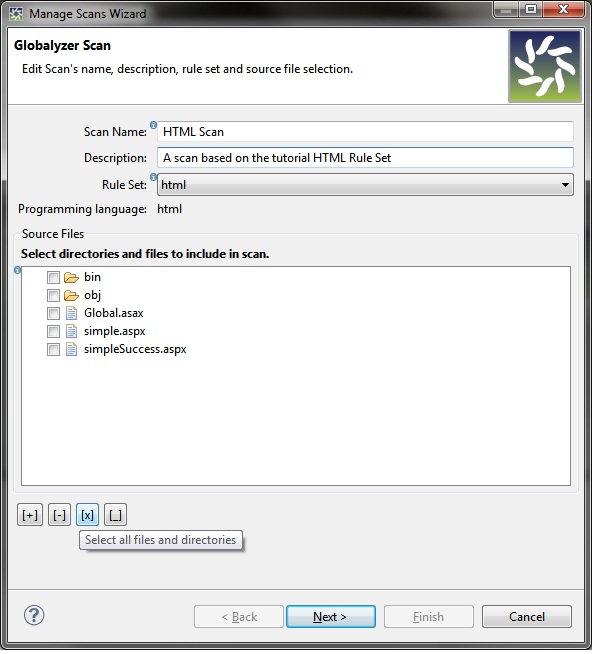
In the Scan Name field enter HTML Scan. In the Description field
enter A scan based on the tutorial HTML Rule Set.
In the Rule Set dropdown, select html.
You may then
choose to click on the Select all files and directories button
shown highlighted in the screenshot below, or alternatively leave everything
unselected. If all items are left unselected while creating a scan, Globalyzer
will assume that everything should be scanned. If some items are selected while
others are unselected, then Globalyzer will only scan the selected items.
Note: The Source Files directory listing will only show files
that are associated with the selected Rule Set (in this case, html).
If you have a project where you want to scan a certain type of
file and they are not showing up, the reason is that the file type
is not added in the Rule Set on the server. You can add or
subtract these file types by editing the Source File
Extensions of your Rule Set on the server, then selecting Project=>Reload Rule Sets
within the client,
and then reopening Manage Scans Wizard by selecting Scan=>Manage Scans.
-
Click Next.
You are presented with the Globalyzer Scanning page
of the wizard. To disable or enable scanning for specific types,
you check or uncheck the types in the Detect pane. These
types correspond to the Detection Rules in your Rule Set,
and tell Globalyzer what to look for. If selected, the scanner
will detect and locate in your source code each of these
categories of items: Embedded Strings, Locale-Sensitive Methods,
General Patterns, and Static File References. Note that since HTML does
not support methods, the Locale-Sensitive
Method option is grayed out.
Uncheck Static File
References, but let Embedded Strings and General Patterns
remain checked.
This is also where you set Source File Encoding, which
tells Globalyzer the file format of your source files. If your
files match the default file format of your local machine, then
leave the setting as SystemDefault. Otherwise, you can
choose the correct file format from the dropdown.
Note: The Source File Encoding field is an important field when it comes
to setting up a Globalyzer Scan for your application. Globalyzer uses this field to
determine how to open source files for scanning and for fixing i18n issues, such as
externalization of strings. Usually, files are encoded in the default format of the
local machine. However, sometimes source files may be in a different
encoding. To ensure that files are read and written properly, Globalyzer will try to
detect the encoding of a source file, regardless the Source File Encoding
setting. As long as the source file has BOM bytes (bytes at the beginning of files that indicate the
encoding), Globalyzer will be successful. This way, if most of your source is encoding in
SystemDefault but there are some files encoded in a file format with BOM (e.g. UTF-16 with BOM),
Globalyzer will be able to correctly handle differently-encoded files.
For this tutorial, leave the Source File Encoding as SystemDefault.
The last set of fields, Comments, are used to instruct the
Globalyzer scanner to skip over a line or block of source code,
ignoring any i18n issues, and also to mark a line as To Do for later refactoring.
Note that these comments will be inserted into the source code. You'll see later in this
tutorial how you can also use "soft" statuses when you want to skip or ignore i18n issues
without actually modifying the source code.

- Click Next, then Finish.
You have just created your first scan.
To create more scans in the future, select
Scan=>Manage Scans from the Menu bar.
Alternatively, right click on
your project and then go to Globalyzer=>Manage Scans.
-
To demonstrate that your Eclipse project is now associated with a Globalyzer project,
right click on it within the Project Explorer view again. Hover
your mouse over the Globalyzer menu option:
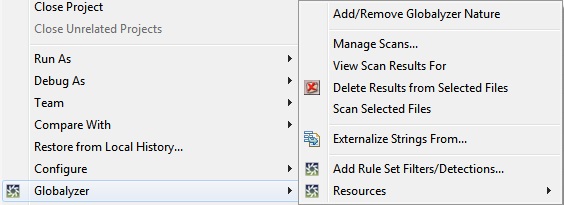
You should now see the new menu items displayed above.
- Although with this simple tutorial it's not necessary to
run the File Inspector, in a larger, more complex
application you will find it very helpful in scoping your
internationalization effort. Select Project=>Run
Project Files Inspector... from the Menu Bar. The File Inspector
dialog displays:
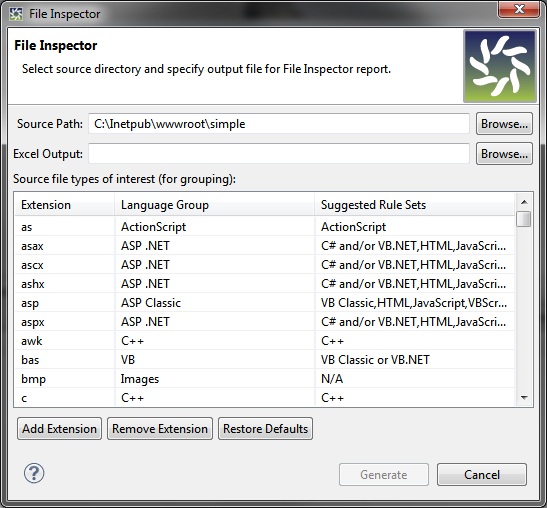
Take a moment to look at the fields. You set the Source
Path to the base of your Source Code files and the
Excel Output path to the file path of the generated Excel file. The Extension
and Language Group columns list the source file extensions that Globalyzer
is to search for and how to group them. For example, .asp is a VB
Classic file extension, whereas acsx, aspx and asax
fall under the ASP .NET language group. You can add and
delete entries using the Add Extension and Remove
Extension buttons. To restore the list back to Globalyzer's
default, click Restore Defaults.
-
Click Add Extension:
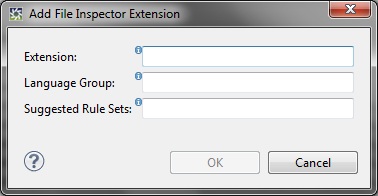
To add a new file extension to an existing group, use the exact
same name in the Language Group field. To add a new group,
fill in a new language group name. For this tutorial, we can use
Globalyzer's default groups, so click Cancel.
-
Fill in or browse to the location of your C# tutorial source code
and enter Simple_FileInspection.xls in the Output
Excel field as shown below.
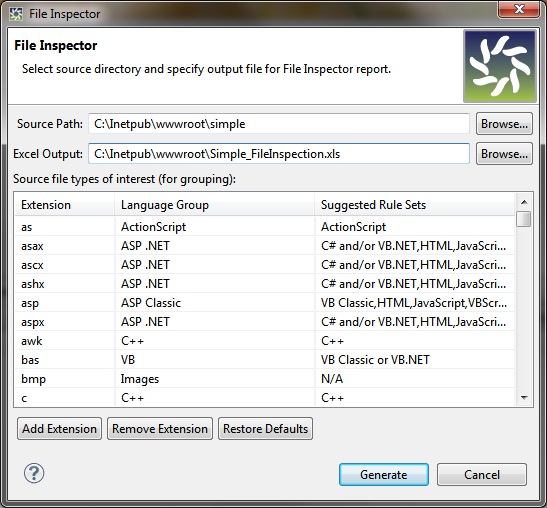
-
Click Generate to create the Excel file.
-
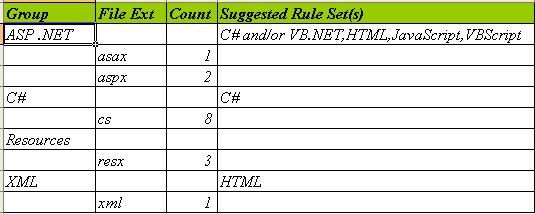
Open Simple_FileInspection.xls. The Summary
worksheet lists and counts files that are grouped in the File
Inspector dialog box. It also lists suggested Rule Sets that you
may need to create in the Suggested Rule Set(s) column.
-
The other worksheets in the File Inspector Excel file give
the details of the grouped files. For example, the following
screenshot shows our CS files in the C# worksheet.
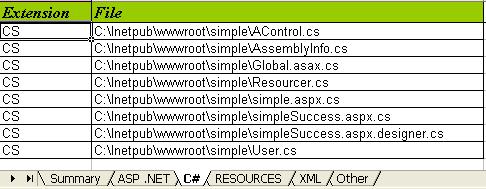
Notice that there are several language groupings and that each
grouping has its own worksheet. In addition, any files that do
not fall into a File Inspector Group will display in the Other
worksheet. After looking at the Other worksheet, you may
want to add file extensions to a File Inspector group as well as
to the associated Rule Sets. In summary, the File Inspector tool
helps in determining:
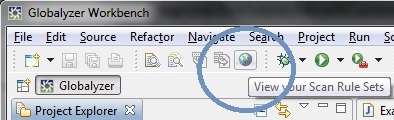
- additional Rule Sets to create (select Project=>Create Rule Set
to create a rule set from the Globalyzer Workbench; click on the View
Rule Sets button to quickly navigate to the Globalyzer Server
when you are ready to customize the new rule set)
- file extensions to add to existing Rule Sets
- additional file extensions and language groupings to add
to the File Inspector
- out-of-scope directories and files to apply to either your Rule Set
File Extension Filters or to your Globalyzer Project Scan directories
-
The last change we need to make is to turn off Globalyzer's
Dictionary feature. By default, Globalyzer will compare each
detected Embedded String against its dictionary files, and filter
those that have no matching words. However, in the case of our
tutorial, the application consists of displaying book titles,
which may or may not be contained in a dictionary, but may
require translation. Therefore, we are going to uncheck this
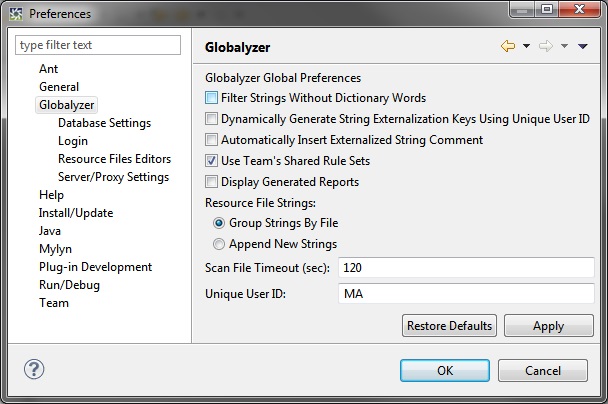
option. Select Window=>Preferences from the Menu Bar,
and navigate to Globalyzer.
-
Uncheck Filter Strings Without Dictionary Words. Your preferences window
should now resemble the screenshot above.
-
Click OK.
With your Project Properties saved and your HTML Scan set
up, you're now ready to scan your code.

 
|
