Scanning Your Code
In this section, you will learn how to view source files in the Source
Files view and how to perform a source code scan.
Note: an online video guide is available for this section
of the tutorial. To see this video, as well as other Globalyzer
video tutorials, click
here. The video guide for this section of the tutorial is
titled "Part Two: Scanning Code and Refining Rules".
-
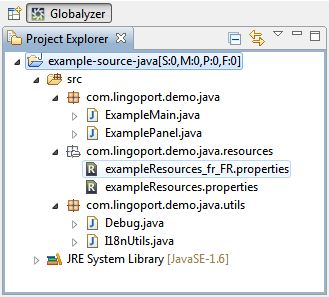
In the Project Explorer view (upper-left corner of the
main window), click the src on the folder directly under
the Project Root. If you've been following along with the
tutorial so far, the Project Root will be called "example-source-java".
The src lets you browse the contents of the source file
path that you specified in the previous section.
Note: just above the Project Explorer view, you can see the
Globalyzer perspective is selected for i18n work. A perspective
is a set of views laid out for specific work.
-
Double-click on any file in the Project Explorer view (you can
also right-click on the file and select Open. The file
opens in the Source Editor view.
Note: some file types do not have specific editor by default; you
may want to install an Eclipse plugin to have more functionality
for the different types of files. To do so, you may want to check
Help=>Install New Software ...
-
To close the file, do one of the following:
-
Click the x next to the file name on the tab.
-
Select File=>Close
-
Click somewhere within the source file so that it is selected
and then press the shortcut key Ctrl-W
-
You are about to identify and work with
internationalization (or i18n) issues.
To scan the source code for internationalization candidate
issues, do one of the following:
-
Select the Scan=>Single Scan menu item for the menu
bar
-
Click in the Scan Results view and press the shortcut key Ctrl-6
-
Click on the scan toolbar item
-
In the Project Explorer view (upper-left corner of the
main window), right-click on the project and select the Globalyzer=>Scan
Selected Files menu item. Note: you can use that technique to
scan one file or a sub-directory by right clicking on that file
or that directory.
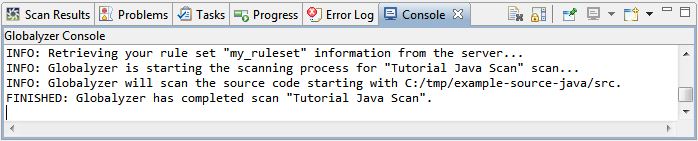
As the scanner scans your code, the following feedback is
provided:
- status messages are printed in the Console view,
at the bottom-right of the main window.
-
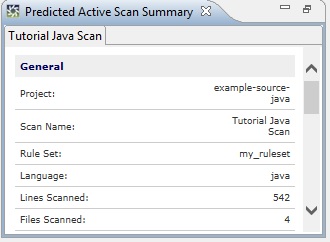
A summary of the candidate active i18n issues is displayed in
the All Predicted Scan Summary view at the lower-left in the
Workbench.
-
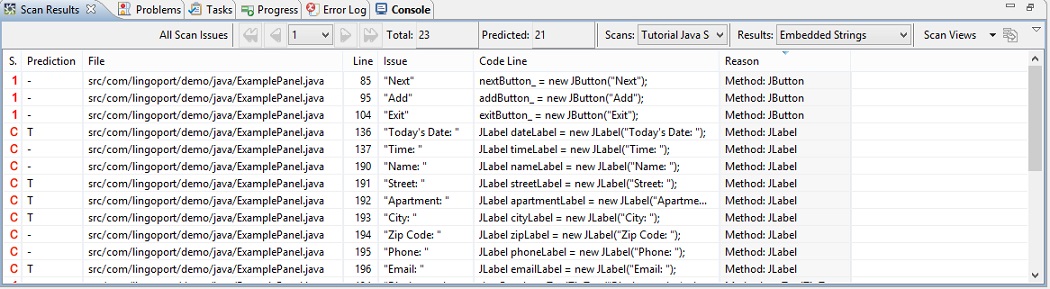
The list of all candidate i18n issues is displayed in the Scan
Result table view at the lower-right in the Workbench. This
table is at the heart of managing i18n issues.
-
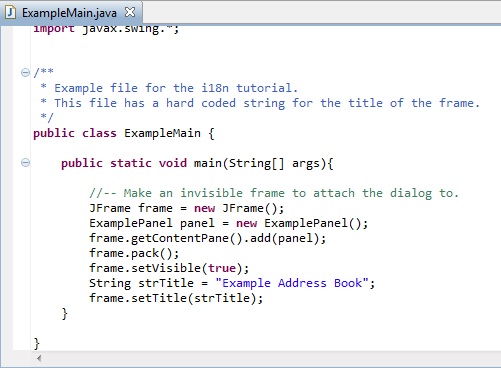
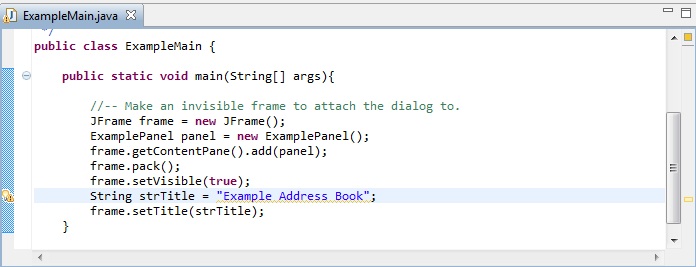
The candidate i18n issues are shown in the Editor view.
Here is for instance the ExampleMain.java editor view. Please
note the hard-coded string "Example Address Book" in the
editor.
Note: the type of issues selected in the Scan Result
table view are shown in the Editor view. If you select only
'ignore' issues in the Scan Result table, only those issues
will be reflected in the Editor view.
In the next sections, you will use the Scan Results table to
manage and fix internationalization issues in the source code.

 
|
